Key takeaways
- Replacement culture: A SCOBY can be reused, but starter tea is consumed as batches are made. Confirm how the kit’s instructions handle replacement or maintaining a backup culture.
- Wear points: Spigot washers and seals can loosen, stain, or retain residue; cloth covers can fray; bottle closures can wear. Check seals for leaks and replace damaged parts rather than improvising with unsuitable materials.
- Cleaning access: A jar with a narrow neck is harder to clean than a wide-mouth vessel. On continuous-brew models, make sure the tap can be removed or cleaned through its internal passage.
- Instructions: Prefer guidance that gives ingredient quantities, fermentation checks, bottling safety, and troubleshooting—not just a one-page recipe. Beginners benefit from explicit advice on temperature, mold identification, and what to do if a batch looks or smells abnormal.
Best Kombucha Brewing Kits: The Right Setup for Your Batch Size
The best kombucha brewing kit for most beginners is a 1-gallon glass setup with a breathable cover, a healthy SCOBY and starter tea, and clear instructions; choose a larger vessel only if you can use the finished tea promptly and have room for it to ferment undisturbed.
A kit’s parts matter less than whether they suit your routine. Vessel capacity determines how much tea you make, starter liquid helps establish the first batch, and a reliably fitted cover keeps out debris while letting the culture breathe. Bottling tools are useful, but they cannot compensate for thin glass, vague instructions, or a missing source of starter tea.
Our top picks
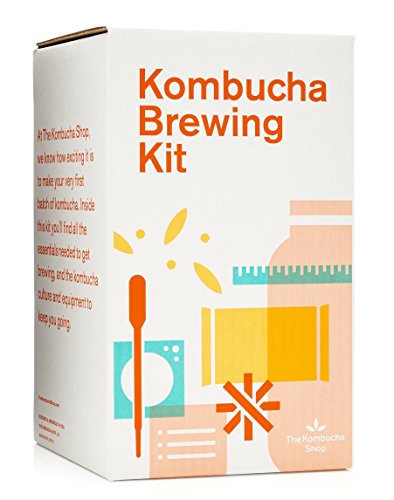
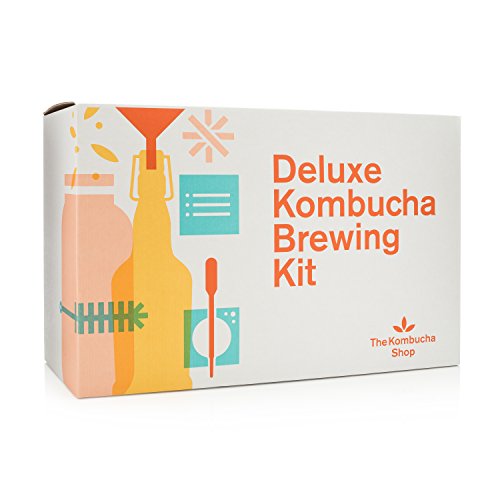
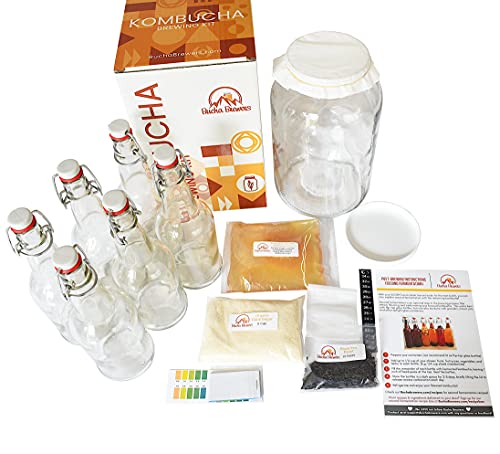

As an Amazon Associate we earn from qualifying purchases at no extra cost to you. Ratings are shown as listed on Amazon.
Compare kit types before choosing
Brands and bundle contents change, so compare the specifications on the current listing rather than assuming every kit from a maker is identical. The figures below are practical selection targets, not claims about a particular model.
| Kit type | Typical vessel capacity | Likely finished batch | Best for | Main trade-off |
|---|---|---|---|---|
| Starter jar kit | 0.5–1 gallon (1.9–3.8 L) | About 0.4–0.9 gallon (1.5–3.4 L) | New brewers, small kitchens, occasional batches | May require separate bottles and a thermometer |
| Complete 1-gallon kit | 1 gallon (3.8 L) | About 0.8–0.9 gallon (3.0–3.4 L) | Most households and first-time brewers | Needs counter or cupboard space during fermentation |
| Large-batch kit | 2–5 gallons (7.6–18.9 L) | About 1.7–4.5 gallons (6.4–17.0 L) | Frequent drinkers or experienced brewers | More lifting, storage, and pressure-bottling responsibility |
| Continuous-brew crock | Often 2–5 gallons (7.6–18.9 L) | Drawn in portions; replenished over time | Regular drinkers who want an ongoing supply | Tap adds a cleaning and leak-checking task |
Finished yield is lower than vessel capacity because the SCOBY and starter tea occupy space, and a portion of the brewed kombucha is usually reserved to start the next batch. Check whether the listed capacity means total jar volume or recommended working volume.
Choose by your brewing situation
| Your situation | What to buy | Why |
|---|---|---|
| First batch, limited space | 0.5–1-gallon wide-mouth glass jar, cover, starter tea, and instructions | Smaller batches are easier to move, inspect, and finish before flavor changes. |
| Beginner who wants fewer extra purchases | Complete 1-gallon kit with thermometer, pH strips, and suitable bottles | It covers the main steps without committing to a bulky crock. |
| Already brewing regularly | 2–5-gallon vessel or continuous-brew crock, with a compatible tap if needed | Higher capacity saves repeated setup, but only if you can consume or share the output. |
| Very warm or cool room | Kit with a thermometer; consider a separate temperature-controlled setup if needed | A thermometer reveals conditions, but a basic kit does not actively regulate temperature. |
What a useful kit should include
Vessel: prioritize access and safe handling
Food-safe glass is a common choice because it is nonreactive and lets you see the culture. A wide mouth makes it easier to add the SCOBY, remove it for cleaning, and inspect the brew. Check the jar’s dimensions and weight when full, not just its gallon capacity; a large glass vessel can be awkward to lift. Avoid brewing kombucha in reactive metal or containers not intended for food use.
SCOBY and starter tea: the liquid matters too
A SCOBY is the cellulose layer that may form at the surface; the living culture is also carried in the starter liquid. Look for a kit that clearly says whether both are included and how much starter tea comes with them. Instructions should explain what to do if the SCOBY arrives cold, delayed, or with less liquid than expected. If a kit includes only a dehydrated culture, check whether it requires a separate activation process and extra time before the first full batch.
Fermentation controls: measure, don’t assume
A strip thermometer or an adhesive thermometer helps you check the room or vessel temperature. pH strips can help track acidity, but they do not replace safe handling or a recipe’s timing guidance. Most basic kits do not heat or cool the brew, so think of “temperature control” as monitoring unless an active controller is explicitly included. Keep the jar out of direct sunlight and away from temperature swings.
Bottling tools: useful, but match them to the process
For flavored, fizzy kombucha, bottles must be made for carbonation pressure and have secure closures. A funnel reduces spills; a bottle brush makes cleaning easier. A siphon or spigot can help transfer larger batches, but a spigot adds a narrow passage where residue can collect. Do not assume ordinary decorative glass bottles are suitable for carbonated drinks.
Setup and maintenance that prevent common problems
-
Wash and inspect the vessel. Clean it with hot water and dish soap, rinse thoroughly, and check for chips or cracks. Avoid abrasive scrubbing that can scratch glass or damage a spigot’s seals.
-
Cool sweet tea before adding the culture. Hot tea can damage the culture. Follow the kit’s recipe for tea, sugar, and water proportions; use plain, unflavored tea for the primary fermentation unless the instructions say otherwise.
-
Cover with a tightly secured, breathable cloth. The cover should keep insects and dust out while allowing airflow. A loose lid or uncovered jar invites contamination; an airtight seal is generally not the right cover for the first fermentation.
-
Leave it still and check periodically. Choose a stable location and avoid repeatedly moving or stirring the jar. Follow the kit’s guidance and taste with clean utensils as fermentation progresses; timing varies with temperature and personal preference.
-
Reserve starter liquid before flavoring. Set aside the amount the recipe calls for to inoculate the next batch. Add fruit or flavorings only during the bottling stage if following a two-stage process.
-
Clean bottles and check carbonation carefully. Use pressure-rated bottles, leave the headspace specified by the recipe, and refrigerate when carbonation is where you want it. Carbonation can build quickly; opening bottles cautiously and chilling them first reduces messy eruptions.
For a worked yield estimate, a 1-gallon vessel holds 128 fluid ounces at full capacity. If you reserve 16 ounces of starter tea and leave roughly 8 ounces of headspace, that leaves about 104 ounces before accounting for the SCOBY and transfer losses—around six 16-ounce bottles, with some variation. This is why a nominal “gallon kit” usually does not produce a full gallon of bottled kombucha per batch.
Ownership details worth checking before checkout
- Replacement culture: A SCOBY can be reused, but starter tea is consumed as batches are made. Confirm how the kit’s instructions handle replacement or maintaining a backup culture.
- Wear points: Spigot washers and seals can loosen, stain, or retain residue; cloth covers can fray; bottle closures can wear. Check seals for leaks and replace damaged parts rather than improvising with unsuitable materials.
- Cleaning access: A jar with a narrow neck is harder to clean than a wide-mouth vessel. On continuous-brew models, make sure the tap can be removed or cleaned through its internal passage.
- Instructions: Prefer guidance that gives ingredient quantities, fermentation checks, bottling safety, and troubleshooting—not just a one-page recipe. Beginners benefit from explicit advice on temperature, mold identification, and what to do if a batch looks or smells abnormal.
If you spot fuzzy growth or a clear sign of mold, do not taste the batch; discard it and clean the equipment thoroughly. For a first purchase, a complete 1-gallon glass kit with starter liquid, a breathable cover, a thermometer, and pressure-rated bottles is the most balanced choice. Pick a smaller jar for limited space, or move to a larger crock only when your brewing and consumption habits justify the extra capacity.