Key takeaways
- Clear glass: can often hang slightly lower because it blocks less of the view.
- Opaque or wide shades: usually work better toward the higher end of the range.
- Low ceilings around 8 feet: choose a compact fixture with a short stem or adjustable cord.
- Ceilings around 9–10 feet: a longer stem can provide better proportion without lowering the shade excessively.
- Very high or vaulted ceilings: use a sloped-ceiling adapter where needed and check that the canopy is rated for the junction box.
The best pendant lights for kitchen islands are sized by the island’s length and seating layout, hung high enough to preserve sightlines, and chosen with enough adjustable brightness for both food preparation and dining.
Our top picks


As an Amazon Associate we earn from qualifying purchases at no extra cost to you. Ratings are shown as listed on Amazon.
Start with the island, not the light fixture
Island pendant lighting works when three measurements agree: fixture diameter, spacing between fixtures, and distance from the countertop. A pendant can look attractive in a listing photograph yet feel crowded, dim, or visually low in a real kitchen.
Measure the island’s length and width, then note whether it has seating on one side or both. Also measure the ceiling height and identify obstructions such as ceiling beams, range hoods, open shelving, and tall sightlines into an adjacent room.
| Island length | Typical pendant arrangement | Recommended pendant diameter | Approximate spacing |
|---|---|---|---|
| 4–5 feet | 1 medium pendant or 2 small pendants | 10–14 inches | 18–24 inches between fixture centers |
| 6–7 feet | 2 pendants | 12–16 inches | 24–30 inches between fixture centers |
| 8–9 feet | 2 large or 3 medium pendants | 14–20 inches | 24–32 inches between fixture centers |
| 10 feet or longer | 3 pendants or a linear fixture | 14–18 inches for each pendant | 24–30 inches between fixture centers |
These are starting points rather than strict rules. A wide, visually heavy shade may need more space than a narrow glass globe with the same stated diameter. Leave roughly 6–12 inches from each island end to the nearest fixture center so the composition does not look pushed toward the edges.
How to calculate the right number and size
For two pendants, mark the island’s centerline along its length. Place the fixtures an equal distance from the center, keeping their centers at least 12 inches from the island ends. For three pendants, divide the usable length into four roughly equal sections and place a fixture at each quarter point.
As a practical check, add the diameters of all fixtures and the gaps between them. For example, a 7-foot island with two 14-inch pendants and a 30-inch center-to-center gap uses:
14 + 30 + 14 = 58 inches
That leaves 13 inches at each end of the island’s 84-inch length. The result is balanced without placing a pendant directly over a corner or seating position.
When in doubt between one large pendant and several small ones, consider the island’s visual weight. A single 24–30-inch dome can suit a compact prep island with no seating, but two or three smaller fixtures usually distribute light more evenly across a long island. Multiple pendants also make it easier to replace or reposition one fixture later.
Choose hanging height for comfort and sightlines
A common starting point is 30–36 inches from the countertop to the bottom of the shade. This range illuminates the work surface while allowing most people to see across the kitchen. For a 36-inch-high countertop, that places the bottom of the pendant about 66–72 inches above the finished floor.
Adjust that range according to the shade and the room:
- Clear glass: can often hang slightly lower because it blocks less of the view.
- Opaque or wide shades: usually work better toward the higher end of the range.
- Low ceilings around 8 feet: choose a compact fixture with a short stem or adjustable cord.
- Ceilings around 9–10 feet: a longer stem can provide better proportion without lowering the shade excessively.
- Very high or vaulted ceilings: use a sloped-ceiling adapter where needed and check that the canopy is rated for the junction box.
Do not measure from the ceiling to the bottom of the pendant alone. The relevant measurement is the distance from the countertop to the bottom of the shade. Temporarily hang a cardboard mock-up or tape a paper template at the intended height; this reveals sightline problems before electrical work begins.
Brightness: plan lumens, not just bulb wattage
Kitchen islands need useful task light, but excessive brightness creates glare on polished stone and stainless steel. For a typical island, aim for approximately 1,500–3,000 total lumens from the pendants, depending on the island size, shade opacity, and the amount of light supplied by recessed or under-cabinet fixtures.
| Island size | Suggested total pendant output | Example configuration | Recommended color temperature |
|---|---|---|---|
| 4–5 feet | 800–1,500 lumens | 1 LED bulb at 800–1,100 lumens, or 2 at 450–750 lumens | 2700–3000K |
| 6–8 feet | 1,500–2,400 lumens | 2 LED bulbs at 750–1,200 lumens each | 2700–3500K |
| 9 feet or longer | 2,400–3,600 lumens | 3 LED bulbs at 800–1,200 lumens each | 3000–3500K |
These figures describe the pendant circuit, not the entire kitchen. If the fixture has a thick metal shade, frosted diffuser, or enclosed globe, select a higher-lumen bulb because some output is absorbed or redirected. Dimmability is more valuable than maximum brightness: set the lights high while chopping and lower them during meals.
Bulb type and color temperature
LED bulbs are the sensible default for kitchen pendants because they use less energy, produce less heat than incandescent bulbs, and are available in dimmable formats. Look for bulbs with a color rendering index of 90 or higher when accurate food color matters.
- 2700K: warm and relaxed, suitable for kitchens that connect to a dining or living area.
- 3000K: a balanced white that works well for most kitchens.
- 3500K: brighter and cleaner-looking for contemporary kitchens or rooms with limited daylight.
- 4000K and above: can appear stark in a residential kitchen unless it matches existing lighting.
Check the fixture’s socket and maximum wattage before buying bulbs. E26 medium-base sockets are common, but some decorative pendants use E12 candelabra bulbs or integrated LED modules. With integrated LEDs, inspect the stated color temperature, dimming compatibility, and expected service life because replacing the light source may require replacing the entire fixture.
Match the pendant style to the kitchen’s practical needs
Glass globes
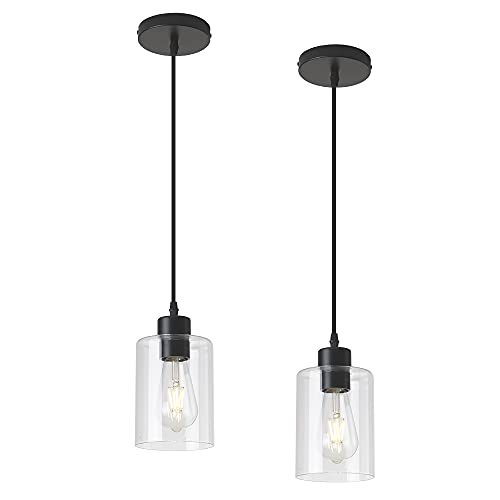
Clear or opal glass gives a lighter visual appearance and spreads light broadly. Clear glass shows the bulb, so choose a decorative LED filament bulb or use a frosted bulb to reduce glare. Opal glass hides the lamp and produces softer light, but may require greater lumen output.
Metal domes
Metal shades direct light downward and suit cooking-focused islands. They conceal the bulb and resist staining, although dark interiors can reduce reflected light. A wide dome can become visually dominant, so keep its diameter proportional to the island width.
Linear pendants
A linear fixture can be more coherent than three separate pendants over a long island. Choose one with independently diffused light along its length, not just a bright point at each end. Confirm that its length leaves at least 6–12 inches of island surface visible at both ends.
Woven and fabric shades
Natural fibers add texture but collect grease and dust more readily than glass or metal. Use them where the island is away from the range and where the shade can be dusted without becoming damp. They are less suitable for a high-splatter cooking zone.
Finish decisions that remain attractive
Match the finish to the kitchen’s visual hardware, but do not assume every metal must be identical. Black, aged brass, polished nickel, chrome, and bronze can work together when one finish is clearly dominant and the others are repeated sparingly.
For a durable choice, favor powder-coated metal, properly sealed brass, thick glass, and solid mounting hardware. Plated finishes can show fingerprints or wear around the canopy, while unlacquered brass changes color through handling and humidity. A matte finish disguises dust better than polished metal, but textured finishes may be harder to wipe clean.
Decision matrix for common kitchen situations
| Your situation | Best starting choice | Why |
|---|---|---|
| Small island, low ceiling, limited budget | One 12–16-inch opal-glass or shallow metal pendant | Compact, forgiving, and usually uses one readily available LED bulb |
| Long island with three or more seats | Two or three 12–18-inch pendants, or a 60–72-inch linear fixture | Provides more even coverage and supports the island’s length |
| Island used mainly for food preparation | Downward metal shades with 3000–3500K dimmable LEDs | Directs light to the work surface and limits wasted upward light |
| Open-plan kitchen beside a living room | Glass or softly diffused pendants at 2700–3000K | Blends with ambient lighting instead of creating a harsh work zone |
| Frequent cooking and heavy cleaning | Sealed glass or smooth powder-coated metal | Fewer crevices and better resistance to grease and wiping |
Installation and ownership details worth checking
Before ordering, confirm that the ceiling junction box is rated to support the fixture and that the electrical box is centered where the pendant will hang. Heavy glass and metal fixtures may need additional support. Multiple pendants should ideally be controlled by a compatible dimmer, and all bulbs must support that dimmer to avoid flicker.
The parts most likely to cause trouble are usually not the shade itself. Cord grips can loosen, exposed bulbs gather grease, cheap dimmers can buzz, and decorative bulbs may fail sooner than enclosed LEDs in a hot fixture. Keep the installation instructions, spare mounting screws, and the bulb specification in a labeled drawer.
Clean glass and metal with a soft, lightly damp cloth after switching off and allowing the fixture to cool. Avoid spraying cleaner directly toward the socket, cord, canopy, or integrated LED housing. For kitchens with frequent frying, wipe the underside of metal shades regularly rather than waiting for a thick film to build up.
Final buying checklist
- Measure island length, width, ceiling height, and countertop height.
- Choose one, two, or three fixtures based on coverage and island length.
- Keep pendant centers roughly 24–30 inches apart where space allows.
- Start with the shade bottom 30–36 inches above the countertop.
- Specify total lumens, not only wattage.
- Choose dimmable LEDs, a compatible dimmer, and a color temperature that matches nearby lights.
- Prefer wipeable materials when the island is used for cooking.
- Use a temporary paper or cardboard template to verify scale and sightlines before installation.
The right pendant is the one that fits the island mathematically but also behaves well every day: bright when preparation demands it, dim when people gather, easy to clean, and visually quiet enough that the kitchen—not the fixture—remains the focus.